Import multiple expenses at once using a CSV file. This is useful when you need to add a batch of expenses from a credit card statement or an external system.
Overview
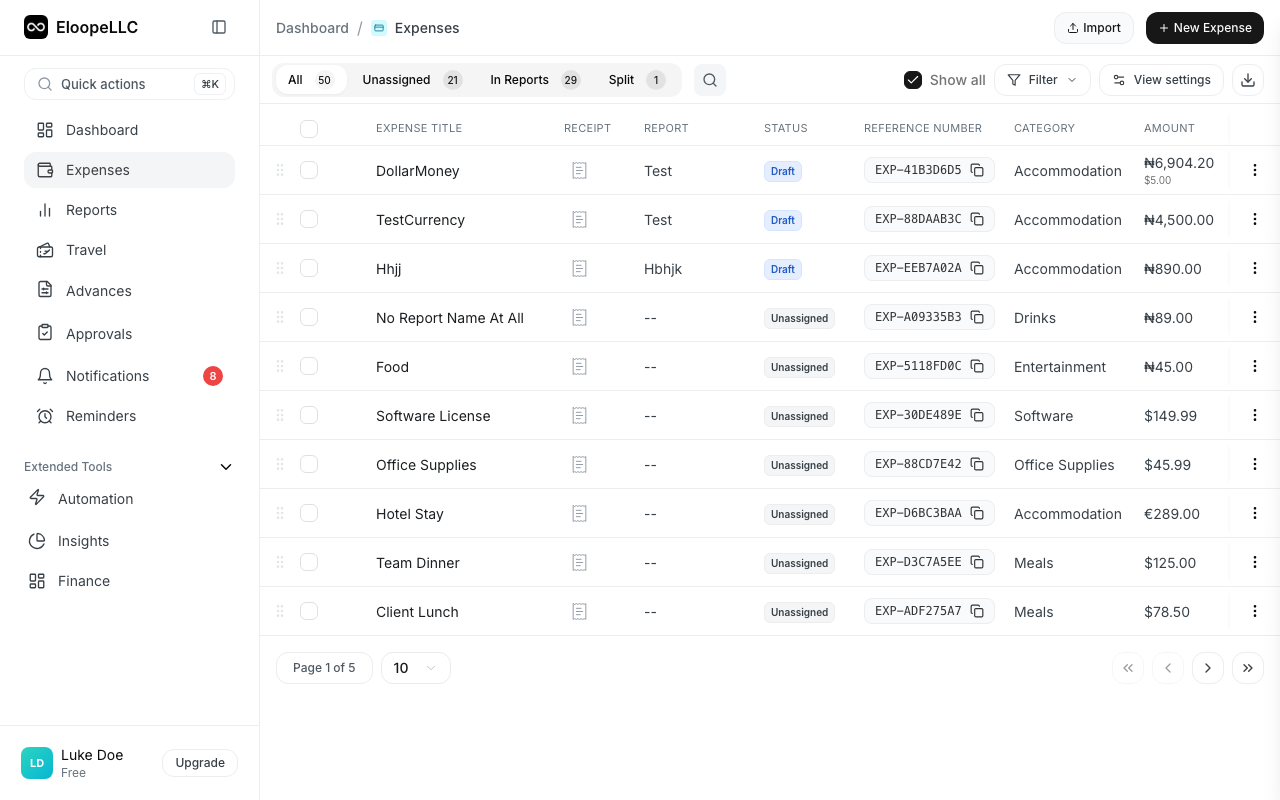
Instead of creating expenses one at a time, you can upload a CSV file containing multiple expenses and import them all in a single operation. Imported expenses appear in your expenses list with Draft status, ready for review.
How to import expenses
The import process has four steps: upload, map, preview, and confirm.
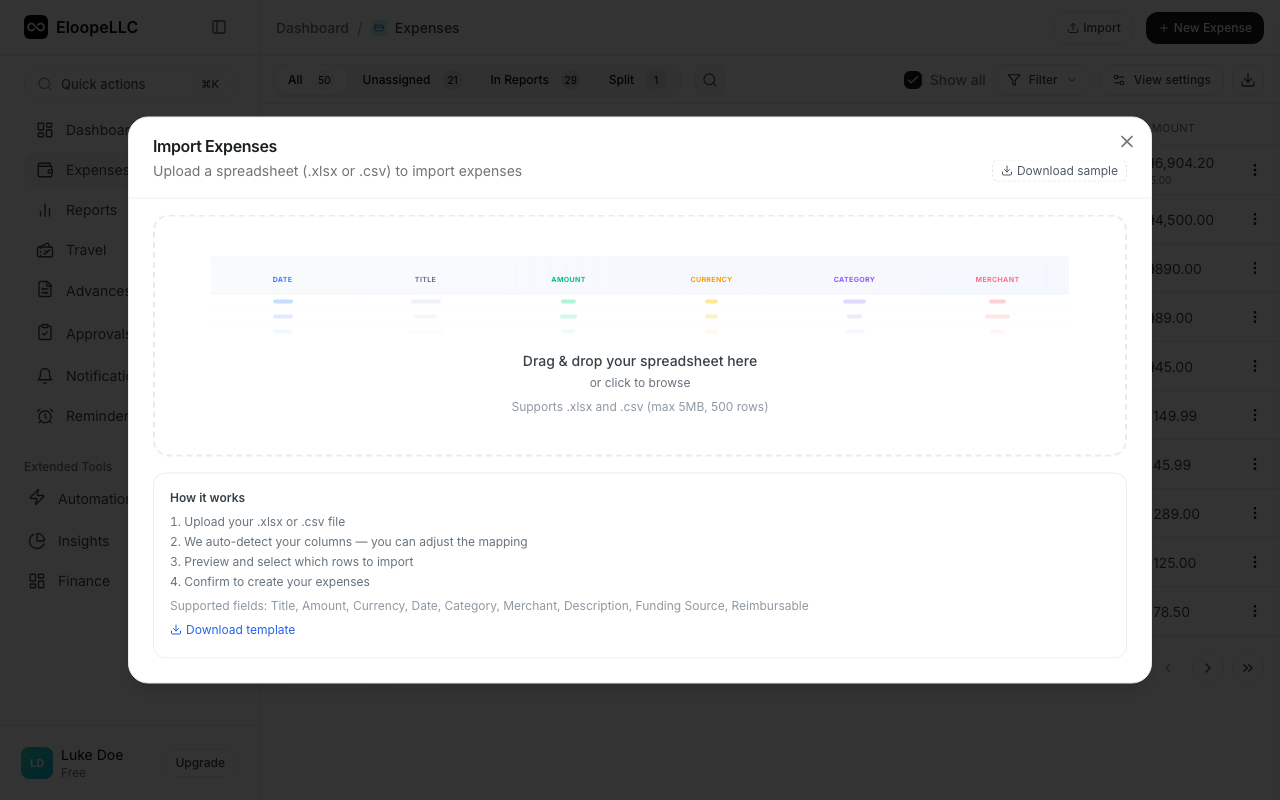
Step 1: Upload your file
- Navigate to Expenses in the left sidebar.
- Click the Add Multiple dropdown option in the top-right corner.
- Drag and drop your file or click to select it. Accepted formats: .xlsx and .csv.
- Optionally, click Download sample template to get a pre-formatted file.
- Click Next.
Step 2: Map columns
Eloope auto-detects column mappings from your file. Review and adjust them.
- For each Eloope expense field on the left, select the matching spreadsheet column from the dropdown on the right.
- A preview panel shows sample data from the selected column.
- Required fields are marked with an asterisk (*): Title, Amount, Currency, Date, Category, and Merchant.
- Optional fields include Description, Funding Source, and Reimbursable.
- Click Next.
Step 3: Preview and edit
Eloope displays an editable table of parsed expense rows. Review the data carefully.
- Rows are marked as Valid or Error with visual indicators.
- Click any cell to edit it inline.
- Use Select All Valid to select only error-free rows for import.
- Use Remove Error Rows to clear invalid entries.
- Click Next when your data looks correct.
Step 4: Confirm and import
- Eloope shows import progress with success and failure indicators per row.
- Review the final summary showing how many expenses were created and how many had errors.
- Click Done to finish, or Import Another to start a new import.

Required file columns
Your spreadsheet must include at least these six columns:
| Column | Description |
|---|---|
| Title | The name or description of the expense. |
| Amount | The expense amount. Use a period as the decimal separator. |
| Currency | Three-letter currency code (e.g., USD, EUR, GBP). |
| Date | The date of the transaction. Accepted format: YYYY-MM-DD. |
| Category | Must match an existing category name in your Eloope account. |
| Merchant | The name of the vendor or business. |
Optional file columns
You can also include these columns for more complete records:
- Description: A note or memo for the expense.
- Funding Source: How the expense was paid (Business, Personal, Company Card, etc.).
- Reimbursable: Whether the expense is reimbursable (true/false).
After import
All imported expenses are created with Draft status. This gives you a chance to:
- Review each expense for accuracy.
- Attach receipts where needed.
- Assign categories if they were not included in the CSV.
- Add expenses to a report when ready.
Note: If an error occurs during import, Eloope tells you which rows failed and why. Fix the issues in your CSV and re-import only the failed rows.