Organize all your travel-related expenses, advances, and documents in one place by creating a trip in Eloope.
What is a trip?
A trip groups everything related to a single business travel event (expenses, cash advances, receipts, and travel documents) into one record. Instead of tracking flights, hotels, and meals as separate expenses, you bundle them under a trip for a complete picture of your travel spending.
Trips make it easier for you and your approver to review travel costs. They also help your finance team track travel budgets and enforce travel policies.
Travel types
Eloope classifies trips into two travel types:
- Domestic: Travel within your home country. Shown with a car icon.
- International: Travel outside your home country. Shown with a plane icon.
The travel type is selected when you create a trip and may affect which policies and approval rules apply.
Create a new trip
- Navigate to Trips in the left sidebar.
- Click New Trip in the top-right corner.
- Fill in the trip details (see below).
- Click Create Trip.
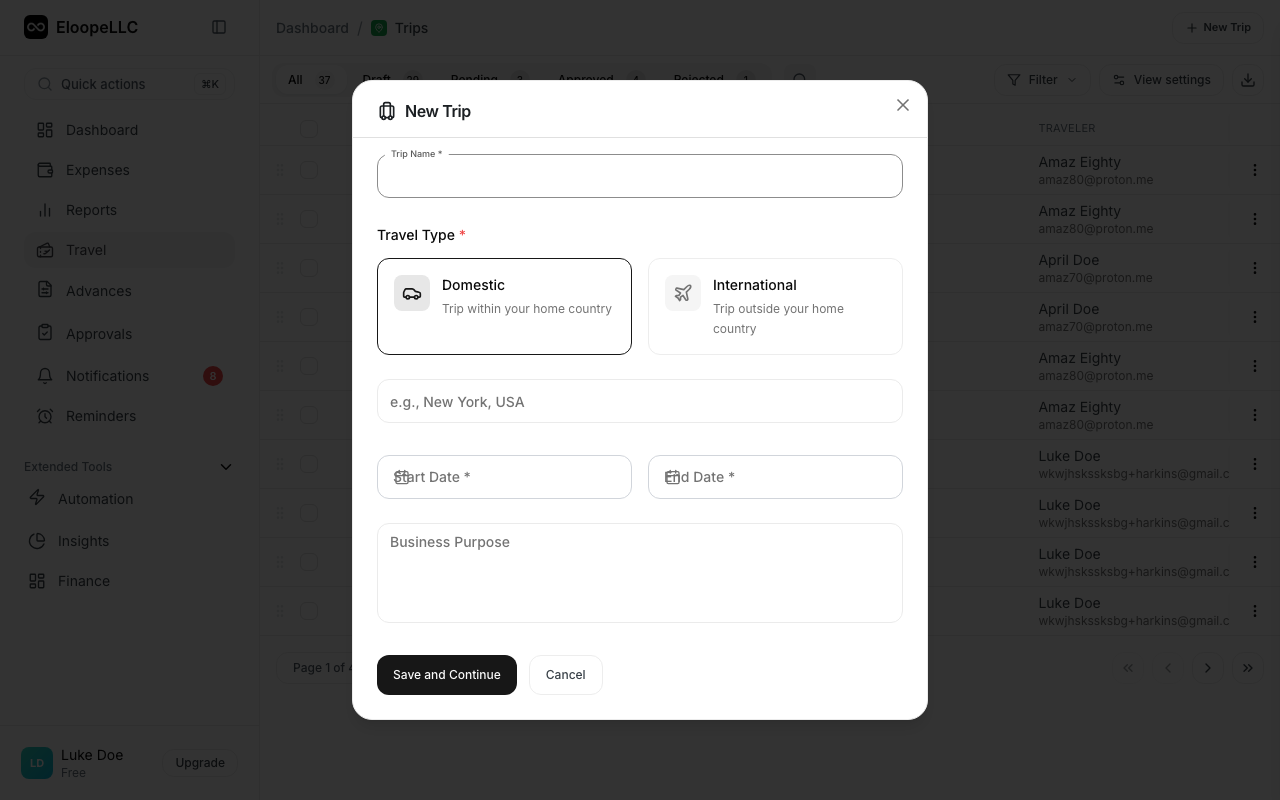
Trip fields
Every trip requires the following information:
- Trip Name: A descriptive title (e.g., "Q1 Sales Kickoff: Austin"). You can click the AI generate button to auto-suggest a name.
- Travel Type: Select Domestic or International.
- Destination: Where you are traveling (e.g., "New York, USA").
- Start Date: When your trip begins.
- End Date: When your trip ends.
- Business Purpose: The business reason for the trip (up to 250 characters). You can click the AI generate button for a suggested purpose.
The trip detail page also tracks additional information such as estimated cost, budget limit, actual cost, per diem rate, and advance details. These fields are populated as you add travel documents and link expenses.
Trip detail page
The trip detail page organizes information into expandable sections:
- Basic Information: Trip name, reference number, destination, travel type, dates, and business purpose.
- Traveler Information: Traveler name, email, department, and cost center.
- Flight Details: Ticket type (one-way, round trip, multi-city), class, route, departure/return dates, seat and meal preferences, and frequent flyer number.
- Multi-City Itinerary: Numbered segments showing each leg of a multi-city trip.
- Hotel / Accommodation: Hotel name, city, room type, check-in/check-out dates, and loyalty number.
- Ground Transportation: Car type, pickup/return locations and dates.
- Budget & Costs: Currency, estimated cost, budget limit, actual cost, per diem rate, advance requested, and advance approved.
- Policy Compliance: Whether the trip is policy compliant, any violations, and exception reasons.
- Traveler Safety: Emergency contact, passport details, visa status, travel insurance, and medical notes.
- Approval Information: Approver name, submitted/approved/rejected dates, and rejection reason.
- Linked Expenses: Total count and list of expenses linked to the trip, with an Add Expense button.
Link expenses and advances
You can connect expenses and cash advances to a trip at any time:
- From the trip: Open your trip and click Add Expense to attach items.
- From an expense: When creating or editing an expense, select the trip from the Trip dropdown field.
Linked items appear on the trip detail page, giving you a real-time view of actual spending against your estimated budget.
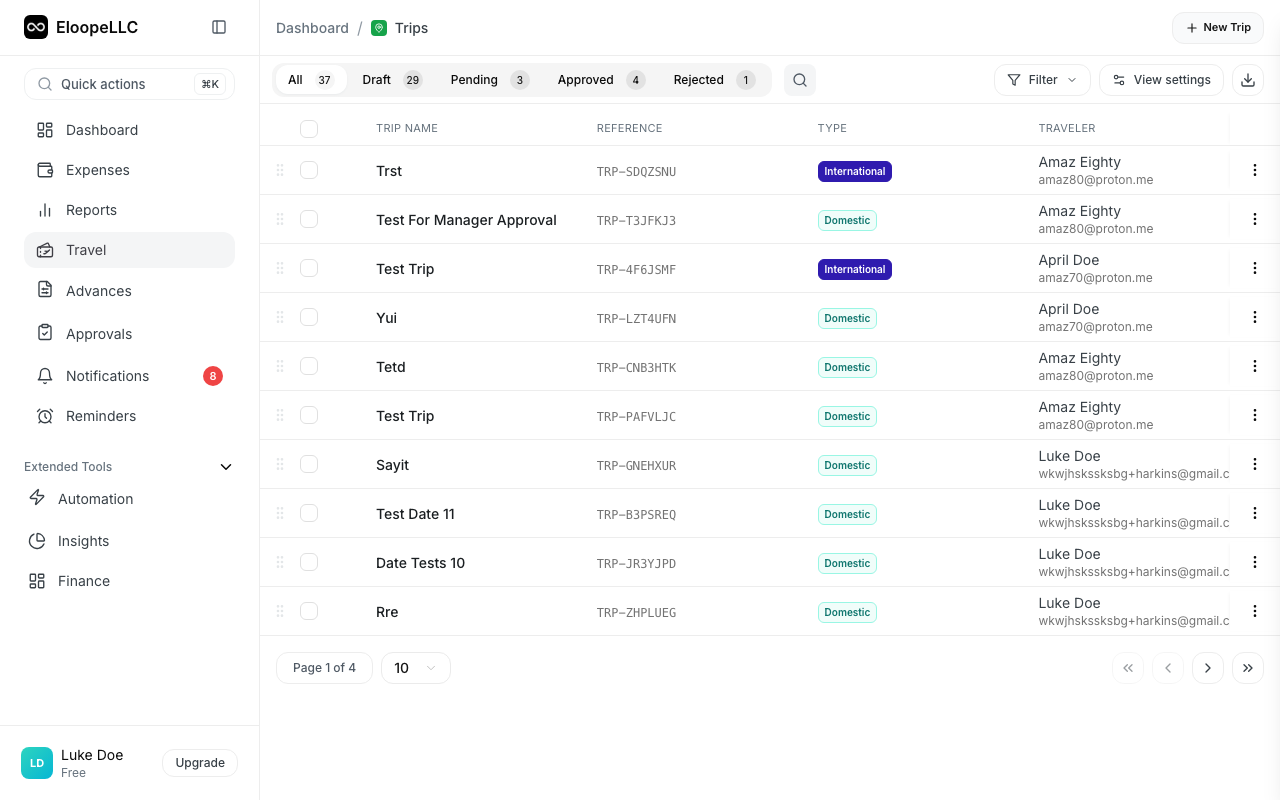
Trip statuses
Every trip moves through a series of statuses:
| Status | Meaning |
|---|---|
| Draft | Created but not yet submitted. You can edit all fields freely. |
| Pending | Sent for approval. Waiting for your manager's review. |
| Approved | Your manager approved the trip. You can now request advances and incur expenses. |
| Rejected | Your manager rejected the trip. Review their comments and resubmit if needed. |
| In Progress | The trip is currently underway (between start and end dates). |
| Completed | The trip is finished and all expenses have been settled. |
| Cancelled | The trip was cancelled before completion. |
Note: You can only edit or delete trips that are in Draft status. Once a trip is submitted, it must be recalled before making changes.