Group related expenses into a single report for organized submission and approval.
What is a report?
A report is a collection of related expenses submitted together for approval. Instead of sending expenses one at a time, you bundle them into a named group that your manager reviews as a single package.
Common examples include "March Business Trip," "Q1 Client Dinners," or "February Office Supplies." How you organize reports is up to you: just keep them logical and easy for your approver to review.

Create a new report
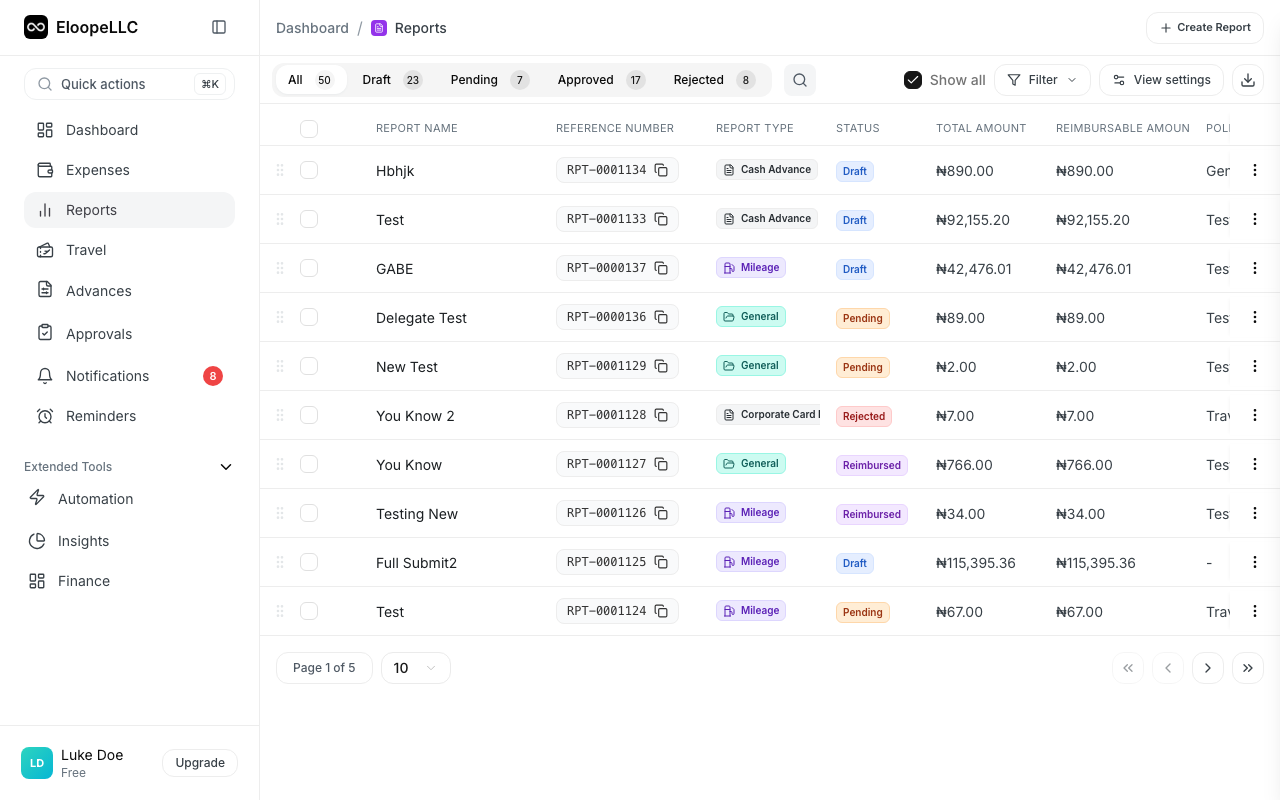
- Navigate to Reports in the sidebar.
- Click Create Report.
- Fill in the required fields:
- Report Name: Enter a descriptive title (e.g., "March 2026 Travel Expenses"). You can click the AI generate button to auto-suggest a name based on the report type and purpose.
- Report Type: Select from the dropdown (fetches your organization's configured types with icons and descriptions).
- Business Purpose: Describe why these expenses were incurred. You can click the AI generate button for a suggested purpose.
- Policy: Select the expense policy that applies to this report.
- Click Create Report.
Note: Report types and policies are configured by your organization's admin. If you don't see the right type or policy, contact your admin.

Add expenses to a report
There are two ways to add expenses to a report.
From the Expenses page
- Navigate to Expenses and open the Unassigned tab
- Select the expenses you want to add using the checkboxes
- Click Add to Report
- Choose the target report from the dropdown
- The selected expenses move into the report
From the Report detail page
- Open the report you want to add expenses to
- Click Add Expenses
- Browse your unreported expenses
- Select the ones you want to include
- Click Add
Remove expenses from a report
You can remove expenses from a report at any time before submitting it.
- Open the report
- Find the expense you want to remove
- Click the Remove button next to the expense
- The expense returns to your Unassigned list
Rules to keep in mind
- An expense can only belong to one report at a time. To move an expense to a different report, remove it from the current report first.
- You can add and remove expenses freely while the report is in Draft status.
- Once you submit a report, you must recall it before making changes. See Recall a report.
- Reports with zero expenses cannot be submitted.
Tips for organizing reports
Group by purpose. Keep trip expenses, office supplies, and client meals in separate reports. This makes review faster for your approver.
Use clear names. "NYC Client Visit: March 2026" is better than "Report 3." Descriptive names help everyone find and reference reports later.
Submit regularly. Don't let unreported expenses pile up. Weekly or bi-weekly submissions keep your records current and speed up reimbursement.